The Finishing Touches of a Great Architectural Lighting Photo
Working as a lighting designer for two decades, I’ve built a career around creating lighting environments by blending light from various sources, angles, colors, textures and intensities. As with any skill, it takes practice and experience to know what types of light sources to use, where to place them, how to control them and how to best use them to create the results you want. Like painting on a canvas, it’s a process of “layering” light onto a stage or environment to create a dramatic result. Little did I know when I started exploring the world of photography that the same blending and layering strategies would allow me to create dramatic photos of lighting environments.
As I’ve learned over the years of photographing architectural and lighting projects, I need to employ just as much creativity (and time) during the photoshoot as I do after the photoshoot to create the final images. In “Shutter, Click, Snap: Part I” (LD+A, June 2024), we reviewed the steps to take before the photoshoot. Now, we are going to review the more technical side of photography and the steps to take during and after the photoshoot. While there are many methods to achieving a great photo (likely as many as there are photographers), this is the process I have successfully used in the past. Anote on tools and file formats: The technique I am about to describe is intended for dedicated cameras such as a DSLR or mirrorless camera. It’s best if this camera has a “manual” operation mode to adjust the required settings. A similar process can be used with smartphone cameras, however, depending on the brand, there may not be as much controllability with the built-in camera apps to simplify the process for the widest range of users. (Some third-party apps may unlock more control.) Similarly, I would recommend using a camera that has the capability of producing RAW files (capitals intended). These are specialized files that can capture more information about the lighting in a scene (and allow greater adjustability in postproduction) than a standard JPEG file that most cameras produce. RAW files may not look as good straight out of camera, but that’s because they are intended to be adjusted to the photographer’s preferences instead of using the manufacturer-dictated preferences on how a photo should look (i.e., JPEG files). Some newer-model smartphone cameras can produce RAW files as well and can be used as part of this workflow.
As mentioned in Part I, a critical element of any architectural photographer’s toolkit is a sturdy tripod. To achieve the best results with the layering and blending effects described below, the camera must not move to allow for several exposures of a scene from the exact same point of view. (A remote shutter release and/or timer is also helpful for limiting camera shake while taking the photos.) If you don’t have a tripod, it is a worthwhile investment—a good one will last years.
Finally, to digitally edit the images, access to high-quality photo-editing software is a necessity. This involves some research, experimentation and trial to determine which software is best for you, but learning this kind of software can be beneficial for all types of photography beyond just architectural photos.
The best way to experience an architectural or lighting design is to see it in person. While an architectural photographer’s job is to capture the environment as the designers intended, for those people who can’t see it in person, the challenge is that human eyes are much more sensitive to light than any camera sensor. A camera simply can’t capture the same amount of lighting information (no matter how advanced or expensive the device). It can’t see into the dark shadows and the brightest highlights like our eyes. When the light in a scene or environment is brighter or darker than the camera can capture, it results in “clipping,” or “overexposed” (pure white) and “underexposed” (pure black) areas of the image.
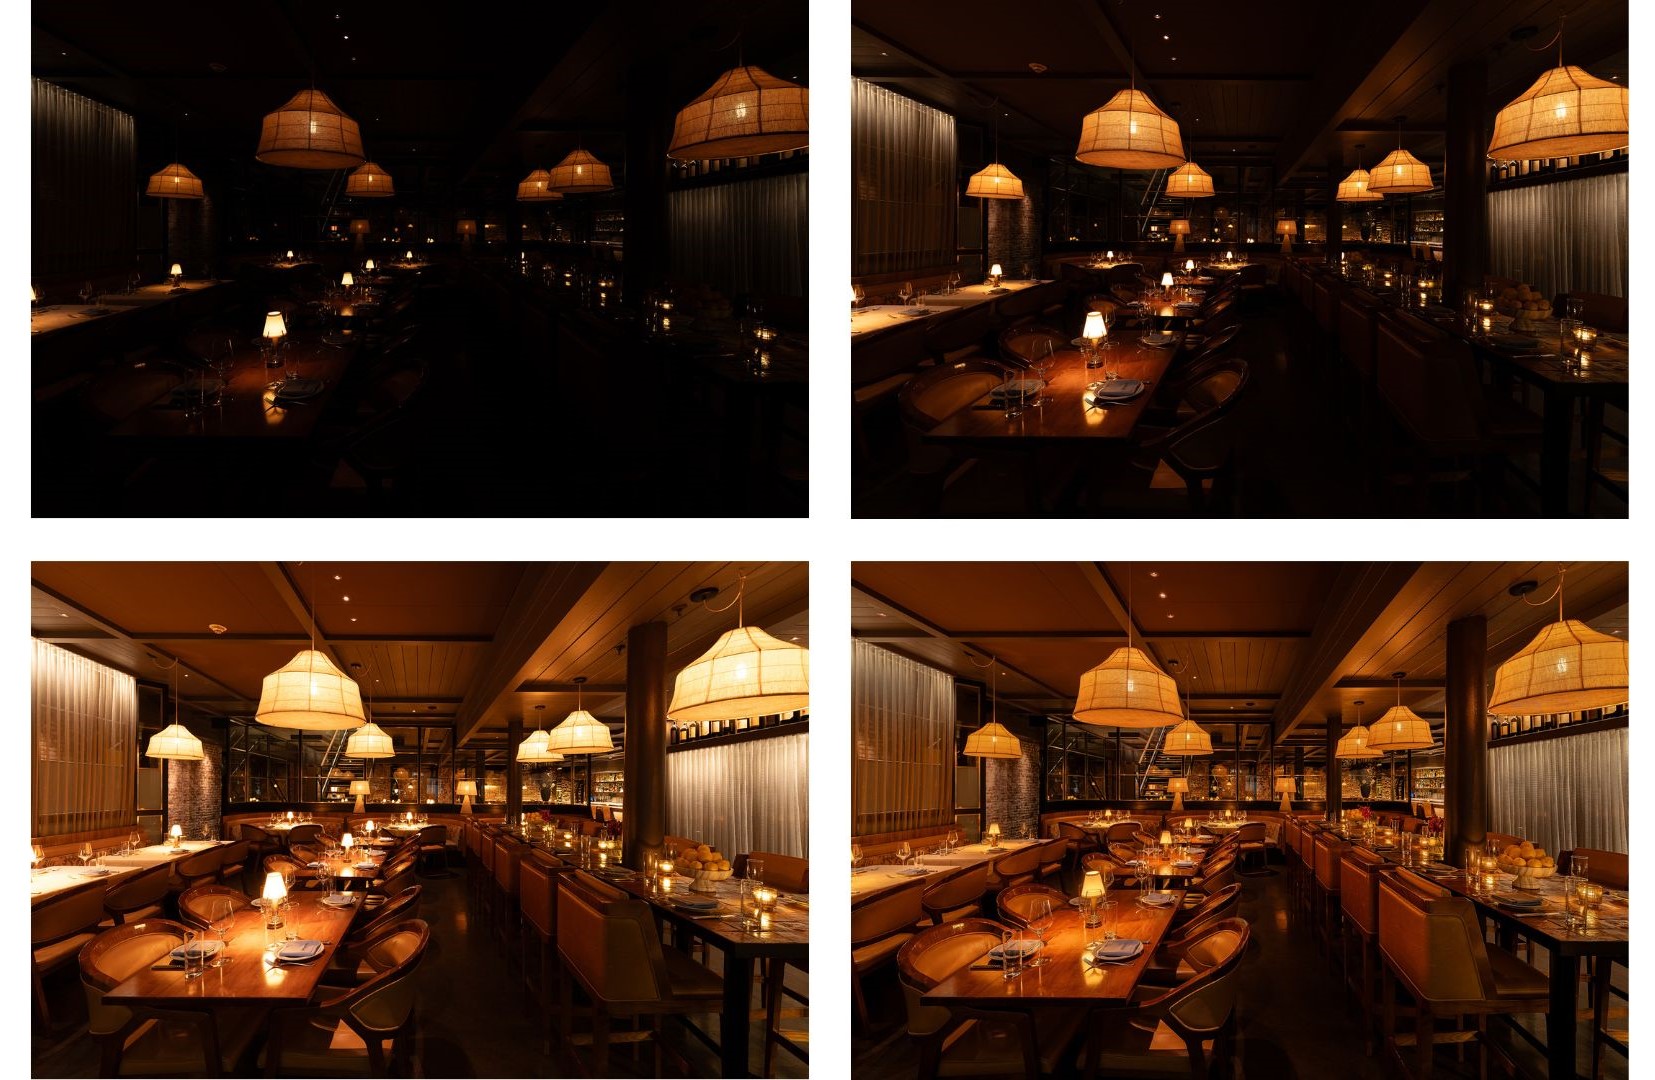
To overcome this limitation and create the most realistic-looking final image, we need to take multiple photos by manually adjusting the camera’s exposure up and down to capture all of the light information in the scene. Depending on the lighting, this could require taking anywhere from three to nine (or more) photos of the same scene at different exposures, which we will then combine in post-processing to create a single final image. This process is often referred to as high dynamic range (HDR) photography. The process to properly expose a photo involves adjusting these three
camera elements:
1. Speed (or ISO): The camera sensor’s sensitivity to light. This is a value that usually starts at 100 and can go up to 6400, 12800 or higher depending on your camera. The more we increase the sensitivity of the sensor, the brighter the image will look. However, increasing this value too much will start to introduce pixelated “noise” into the image, which is not ideal. For this reason, I try to keep this value as low as possible—in the 100 to 400 range—to achieve the cleanest-looking colors, highlights and shadows with minimal noise.
2. Aperture (or Depth of Field): The size of the opening of the mechanical iris inside the camera lens, which controls the overall sharpness of the image. This value is expressed in F-Stops like F2.8, F4, F9, all the way up to F22. In some forms of photography, introducing blur to the background of an image is desirable, however in most situations in architectural photography, we want to be able to see the scene as clearly as possible. To achieve sharpness across the scene, I generally set the camera to between F8 and F11, which is typically the sharpest range for most lenses (depending on the specific lens).
3. Shutter Speed: The amount of time that the camera’s sensor is exposed to the scene. This value is expressed in seconds (or fractions of a second) from 1 ⁄8,000, or 1 ⁄5,000, usually up to 30 seconds. Since ISO and aperture generally remain within a fixed range for architectural photography, this is our main tool to adjust the exposure of our image. Adjust the shutter speed so the camera’s built-in light meter points to “0” (right in the middle of the range from “-2” to “+2”). This should mean that the image is properly exposed.
Once I’ve set up and taken the first photo, the next step is to adjust the exposure above and below the “0” meter reading to capture more information about the lighting in the scene. Use the shutter speed to adjust the exposure until the camera’s meter reads “-2,” which means it is two stops of light under-exposed, then take a photo. This exposure will be used to capture the information in the highlights of your scene, like exposed lightbulbs, decorative light fixtures or other bright light sources. Finally, adjust your shutter speed until the camera’s meter reads “+2,” which means it is two stops of light over-exposed. This exposure is used to capture the information in the shadows of your scene. This process can be repeated at higher and lower exposures to capture even more photos with more information about the scene; generally, I shoot either three or five exposures of each scene depending on the amount of contrast between the highlights and shadows. An odd number of shots always leaves you with a “middle” or “base” exposure, which is important for this process.
After the photoshoot, I typically have a memory card full of files with multiple exposures for each shot, which will then need to be blended in a photo-editing software. To start, I recommend using software that can automatically merge these photos together (one that can “merge to HDR” or has “HDR processing” included). This will usually generate a finished photo in a few clicks, then you can use the other functions of the software to adjust the brightness, highlights, shadows, sharpness and more. Again, this will take some trial and experimentation to learn the process for the specific software that you are using, but it will eventually become second nature with practice. Below are some of the typical adjustments I make to my photos:
- Overlay and blend the best exposures of each shot to “rebuild” the lighting as seen in person.
- Adjust highlights and shadows to create a morenatural-looking image.
- Ensure that the color temperature and color saturation of the scene match the lighting design intent and conditions on site.
- Crop the image as needed to create a more balanced, symmetrical or intentional composition.
- Straighten horizons and vertical lines in the architecture as needed (as discussed in Part I).
- Remove small distractions in the image that are not important to the overall design (blemishes or scratches in walls, ceilings, furniture; dust or dirt on the floor; distracting fire alarms, smoke detectors, etc.).
- Fine-tune the sharpness, contrast and overall appearance of the image to create an attractive final image.
Post-processing ethics are key. As the saying goes, “With great power comes great responsibility,” and this is true for any type of photography, but especially architectural and lighting photography. With the digital tools available today (including the advent of AI-assisted photo-editing software), photographers can easily manipulate or “fake” the appearance of a project, transforming it into something entirely unrelated to its true appearance. Obviously, this would be ethically dubious and generally isn’t the goal of professional photographers.
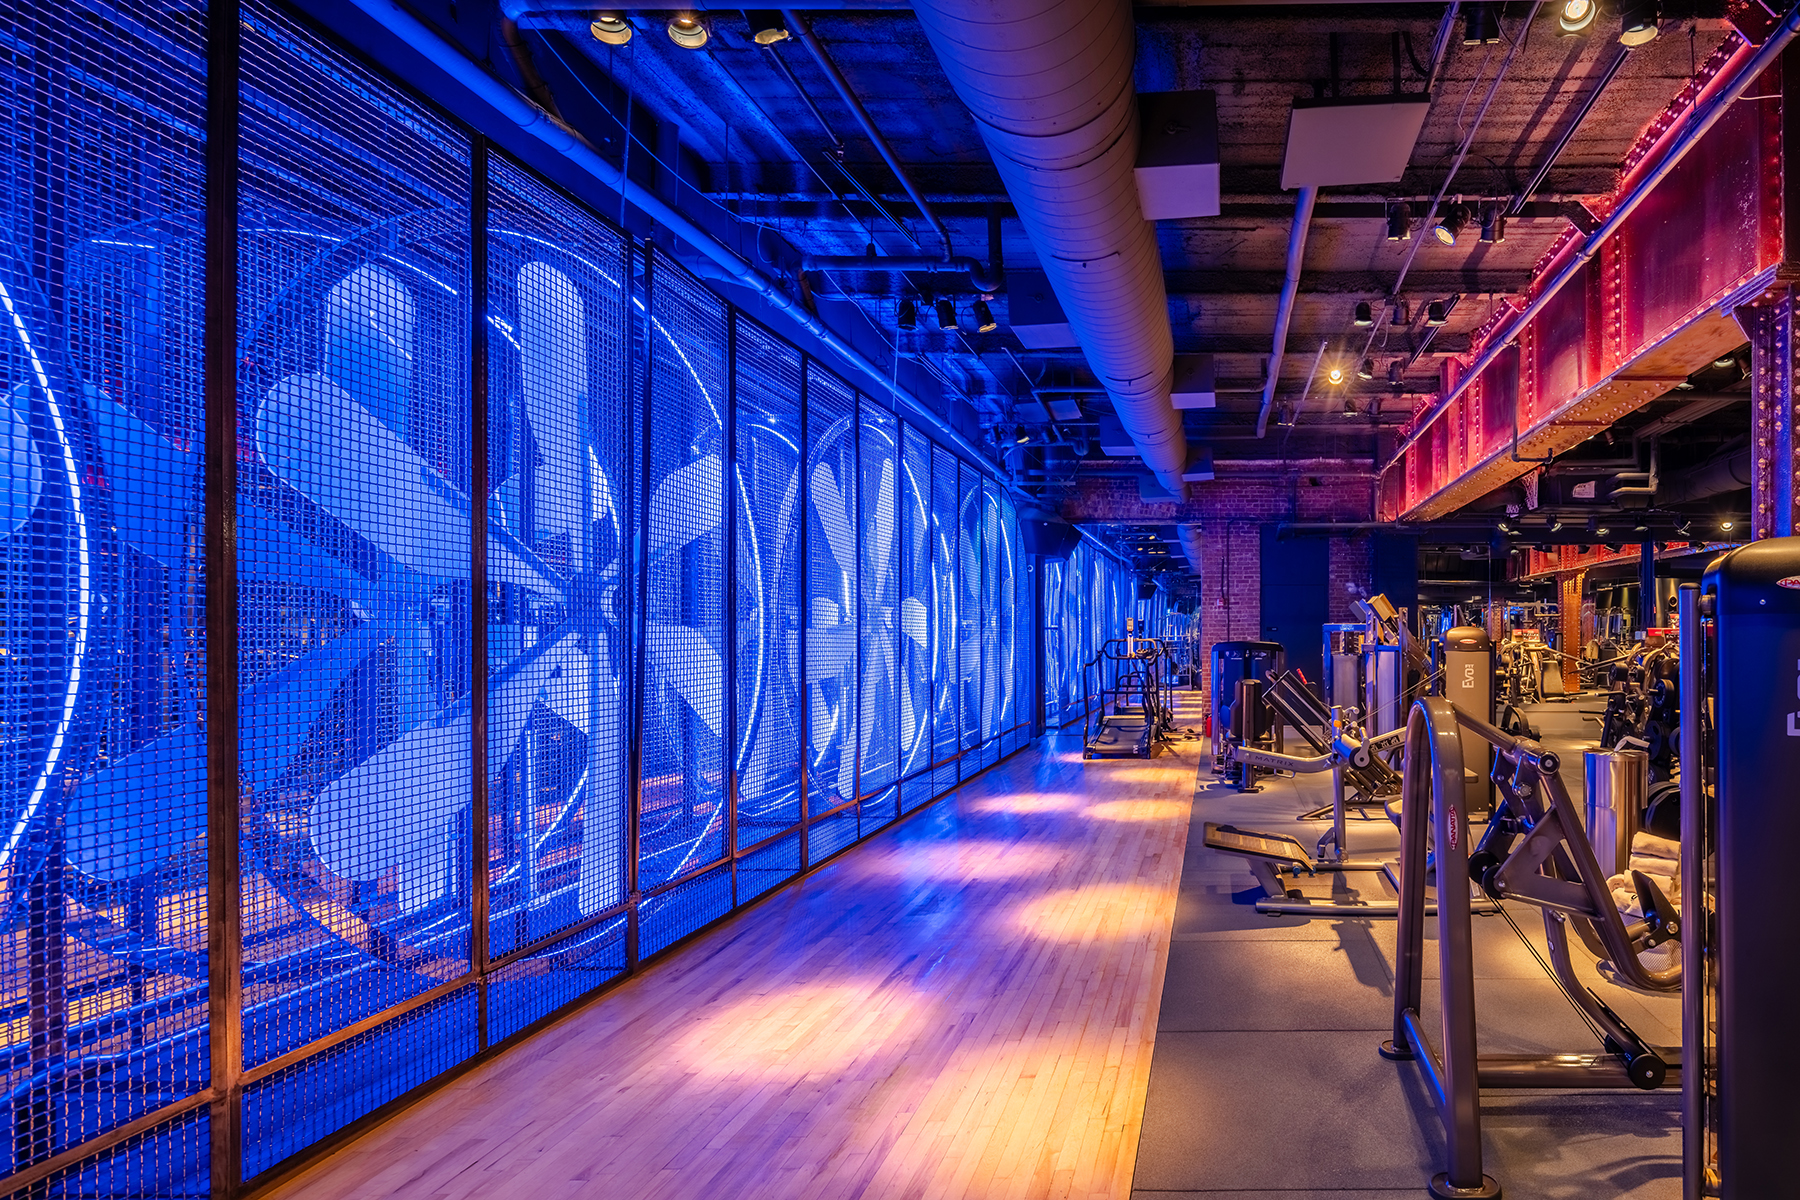
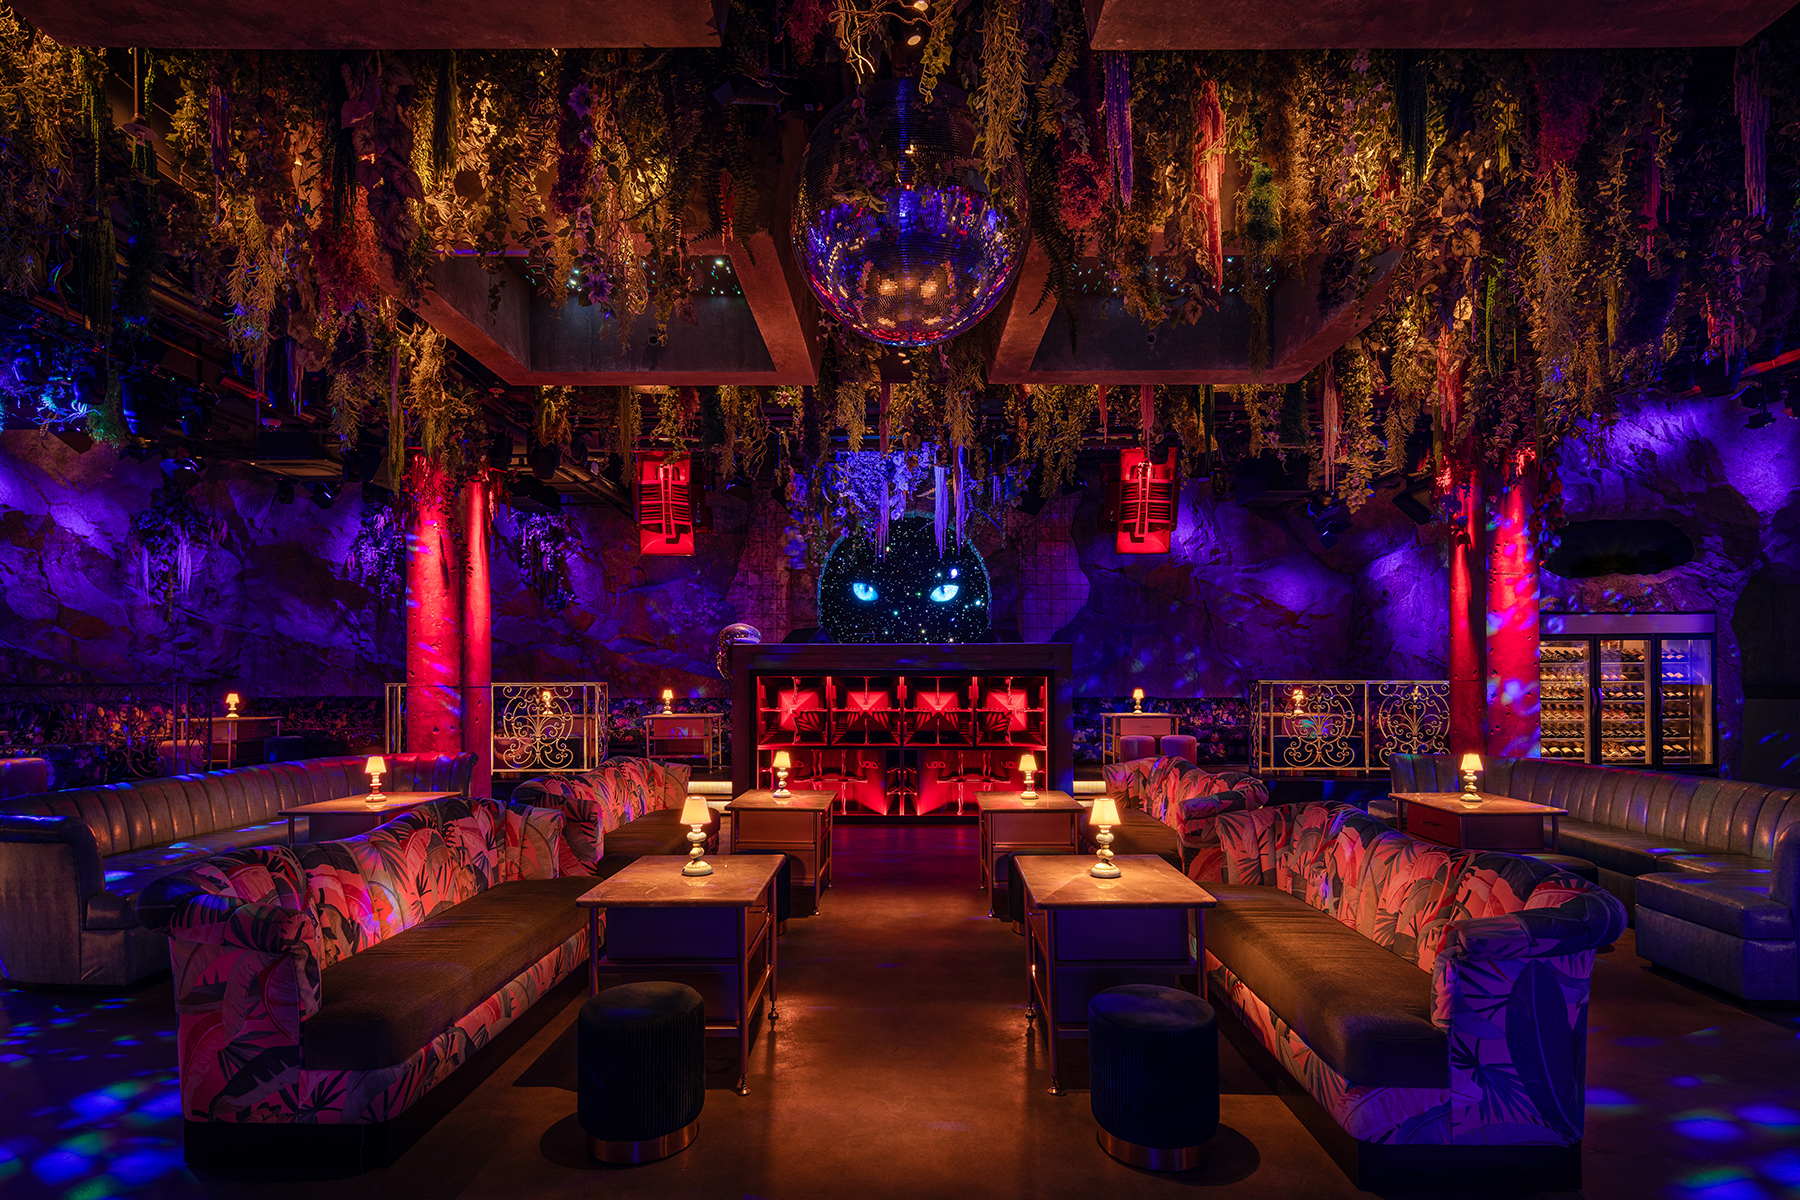
Our goal should be to recreate the appearance of the environment or scene that we’re photographing as true-to-life as possible. For me, that means I follow a few key rules that I’ve set for myself:
- Lighting: Changes of light levels or brightness should be minimal (if at all) and should not fundamentally alter the appearance, composition or design intent of the original lighting design.
- Housekeeping: Cosmetic touch-ups to walls, ceilings or other surfaces should also be minimal, but can be used to minimize distractions in the scene (that don’t impact the overall design intent). Don’t erase the light fixtures from the ceiling!
- People: The subject of the photo is the architecture and the lighting; people in the photo should not be recognizable or distract from the overall composition.
As you’re editing your own photos, think about what types of photo edits you would consider ethical (or not). Once you’ve edited a few photos for yourself, it also becomes easier to recognize the edits that other photographers have made in their photos. I usually ask myself, “Why did they make that decision?” or “How would I have done this differently?” as mental exercises before my next photoshoot.
Ultimately, we must remember that photography is a creative medium. While the subject (architecture) may demand certain standards of realism and composition, no two photographers will have the same interpretation of a scene. As lighting professionals, though, we have an inherent advantage when it comes to photography—our experience with light. Since the two arts share many common concepts, terms and techniques, those in the lighting industry already have a leg up when learning new photography skills. We know how to use light to create a properly composed scene, and we know when something about the lighting scene looks “off.” Those same artistic senses come into play when composing, taking and editing photos.
The hardest part is learning which camera adjustments to make and which buttons to press, but those can all be learned with practice. My final piece of advice: Use each photoshoot as a learning experience and an opportunity to improve.
THE AUTHOR |
Ryan Fischer has been photographing architectural lighting design projects for more than 10 years, and is currently a senior lighting designer at Focus Lighting in New York City. His photography work can be found at www.fischerlighting.com
